Figuring out how to get a bad review removed from your Facebook Page all comes down to one crucial detail: you can only report recommendations that break Facebook's Community Standards. You can't get a recommendation taken down just because it's negative or you don't agree with the customer's take.
This is the most common misconception I see business owners struggle with. They get a scathing review and immediately want it gone, but Facebook's role isn't to mediate customer service disputes. It’s to enforce its own rules.
What You Can (and Can't) Do About Facebook Recommendations
A few years back, Facebook ditched the classic 1-to-5 star rating system for a much simpler "Recommendations" model. Now, customers just say "Yes," they recommend you, or "No," they don't. While this makes leaving feedback faster for users, it can be a nightmare for a business owner facing a bogus or malicious comment.
That simple "No" recommendation often feels much more damaging than a 3-star review ever did, especially when it’s paired with a nasty story. So, before you do anything, you need to understand the rules of the game.
Spotting a Violation vs. a Bad Opinion
Your entire strategy hinges on this one question: is the recommendation a genuine (though negative) opinion, or does it actually cross the line into a policy violation?
Facebook moderators won't step in just because a customer had a crummy experience and decided to tell the world about it. Their job is to enforce a very specific set of rules.
Here's what you need to be looking for:
- Spam: Is the post pushing an unrelated product, filled with shady links, or posted over and over again? That's classic spam.
- Hate Speech: Does the comment attack someone based on their race, religion, gender, or other protected characteristics? This is a serious violation and usually gets removed quickly.
- Harassment: Is the recommendation a personal attack on you or one of your employees? Think threats, nasty insults, or content meant to shame a specific person.
- Fraud: Does the post contain lies meant to mislead people? This can be tough to prove, but if you can show the person was never a customer, you have a solid case.
A classic example is a competitor leaving a fake "No" recommendation with a detailed story about a service they never used. Another one I see all the time is a disgruntled ex-employee trying to trash the company's reputation. These aren't just opinions; they're calculated attacks that break the rules.
If you want a deeper dive into these scenarios, you can find more strategies on how to remove reviews from Facebook and protect your business.
This decision tree gives you a quick visual guide for sorting a real violation from a simple bad opinion.
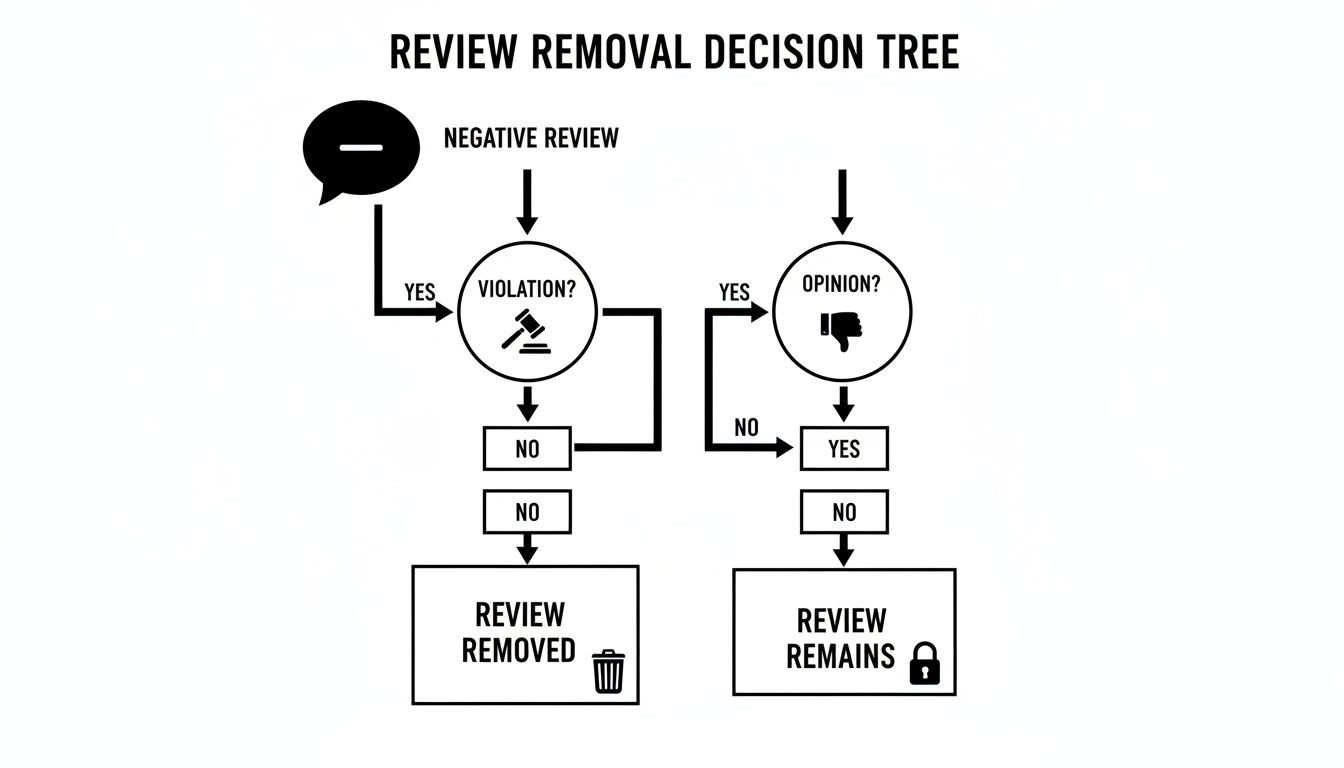
As the flowchart shows, the only way to get a review removed is to prove it violates a policy. Disagreeing with the sentiment isn't enough.
When You Can and Cannot Remove a Facebook Recommendation
Use this table as a quick reference to decide if a negative recommendation on your Facebook Page is a policy violation eligible for removal.
| Reportable Violation (Actionable) | Description and Real-World Example | Non-Reportable Feedback (Not Actionable) |
|---|---|---|
| Spam | The content is irrelevant or repetitive. Example: "Check out my new crypto course! -> [spam link]" |
Negative Opinion |
| Hate Speech | It attacks protected groups based on race, gender, religion, etc. Example: Posting slurs or discriminatory comments. |
Customer Service Complaint |
| Harassment & Bullying | It targets, threatens, or degrades a private individual. Example: "The manager, Jane Doe, is an idiot. I'm going to find out where she lives." |
Product or Service Criticism |
| Fraud & Impersonation | The user is verifiably not a real customer or is pretending to be someone else. Example: "This company scammed me!" (You have no record of them as a customer). |
Disagreement Over Price or Value |
This table should help you quickly categorize the feedback you've received and determine if a report is your best next step.
Be Realistic About the Reporting Process
Let's be honest: Facebook moderates billions of posts every day. The first line of defense is almost always an algorithm. So, don't be shocked if your initial report gets rejected.
An automated system can easily miss the context of a fake review. This doesn't mean your case is weak—it just means a human probably hasn't seen it yet.
The Bottom Line: Your success depends entirely on how well you can connect the recommendation to a specific violation of Facebook's Community Standards. Without that clear link, your report will almost certainly be denied.
Think of it this way: you're not asking Facebook to be the judge in a customer dispute. You're acting as a helpful moderator, flagging content that breaks the platform's own rules. Shifting your mindset from "This isn't fair!" to "This violates the harassment policy" is the key to taking control of the situation.
So, you've spotted a fake or malicious recommendation on your Facebook Page. Now what? Just hitting "report" and hoping for the best is a recipe for frustration.
To get Facebook to actually remove a review, you have to do more than just flag it. You need to build a clear, compelling case that shows exactly how it violates their specific rules. A poorly categorized or rushed report will almost always get an automated rejection, leaving you right back where you started.
Let's walk through the right way to find, document, and report these damaging posts to give you the highest possible chance of getting them removed on the first try.
While these steps work on the mobile app, I find it's much easier to handle this from a desktop, where you have more screen real estate to work with.
Finding and Starting the Report
First things first, go directly to the source. Don't try reporting from a notification or your news feed. Navigate to your business Page and click on the "Reviews" or "Recommendations" tab in the menu.
Once you’ve located the review you want to remove, look for the three dots (...) icon in the top-right corner of that specific post. Clicking it opens a small menu.
You should see an option that says something like "Find support or report recommendation." That's your starting point. Click it to kick off the reporting process.
The Most Important Step: Choosing the Right Violation
This next screen is where most people go wrong. Facebook will show you a list of reasons for your report, and your choice here determines everything. It tells Facebook’s algorithms and human moderators exactly what to look for.
Pick the category that most accurately reflects the problem.
- Spam: This is for obvious junk. Think of recommendations that are just trying to sell something or contain irrelevant, promotional links. If a "No" recommendation says, "Check out my site for cheap crypto! [link]," that's pure spam.
- Hate Speech: Use this only for content that attacks people based on race, religion, sexual orientation, or other protected characteristics. Facebook takes this very seriously.
- Harassment: This is one of the most useful categories for fake reviews. If the post is a personal attack on you or an employee, uses abusive language, or is clearly meant to bully someone, this is the one to choose.
- Nudity or Sexual Activity: This one is pretty self-explanatory and less common for business pages, but it’s there if you need it.
- Something Else: If none of the above are a perfect fit, this option will take you to a more detailed menu.
Don't just reflexively click "Spam" because it's the first option. If a review is a lie but isn't overtly selling anything, "Spam" is the wrong choice and will likely lead to a rejection.
Getting More Specific with "Something Else"
If you clicked "Something Else," you'll get another menu with more targeted options. This is where you can really zero in on the violation.
- Fraud or Scam: This is a fantastic option if you can prove the reviewer was never a customer. A negative post from a competitor posing as a client is a classic example of fraud.
- Unauthorized Sales: This applies if the post is trying to sell illegal or regulated items, like firearms.
- Intellectual Property: Use this if the post is using your company's logo, copyrighted images, or trademarked slogans without your permission.
- Fake Account: If you've done your homework and the reviewer's profile looks bogus (no friends, stock profile picture, created yesterday), you can report the account itself. Getting the account banned is a surefire way to get its review removed.
The more precise you are, the more credible your report becomes.
Pro Tip from the Trenches: Think of reporting like this: you're telling the Facebook moderator which chapter of their rulebook to open. If you report a personal attack as "Spam," the system will look for spammy links, find none, and close your case. Match the violation to your report category. Accuracy is key.
After you make your selection, some reporting options give you a text box to add more information. If you see this, always fill it out.
This is your shot to state your case clearly and professionally. Keep it brief. For example: "We have no record of a 'John Smith' as a customer. The incident described did not happen at our location. We believe this is a fraudulent review from a competitor, which violates the Fraud and Deception policy."
Once submitted, the report enters Facebook's moderation queue. You can check its status in your Page's "Support Inbox." Then, all you can do is wait.
Building a Strong Case with the Right Evidence
Reporting a malicious recommendation is just the first move. To actually convince Facebook to take down a review that breaks their rules, you have to think like a detective. Your success, especially if your first report gets denied, really boils down to how well you gather and present your evidence.
Simply telling Facebook a review is fake won’t cut it. You have to show them. That means methodically documenting every piece of the puzzle to build a case that's impossible to ignore.
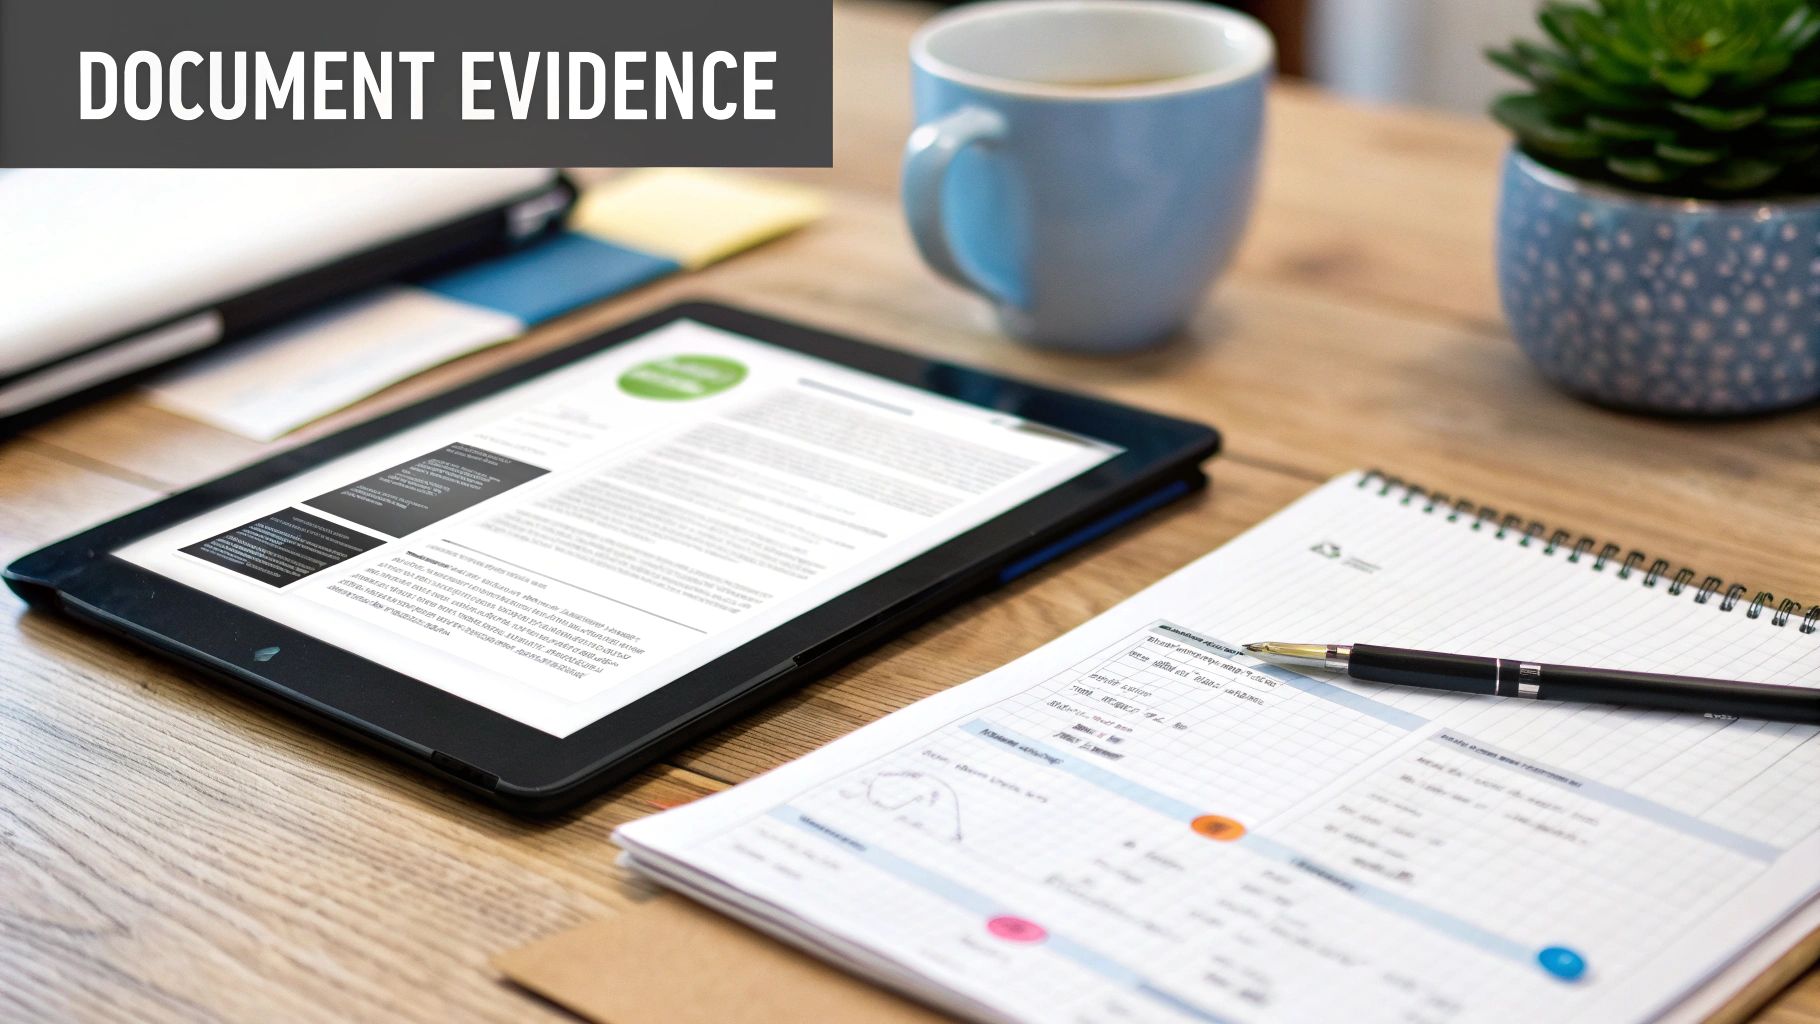
What to Document Immediately
The second you spot a sketchy review, your first job is to preserve the evidence before the user gets a chance to delete or edit it. And I don't just mean a quick screenshot of the review itself—you need to capture the whole picture.
Your evidence file should contain:
- The Full Recommendation: Get a clear, uncropped screenshot of the entire recommendation. Make sure you can see the reviewer’s name, their comment, and the date it went live.
- The Reviewer's Profile: This is critical. Click through to the reviewer's profile and take screenshots. Often, this is where you'll find the most damning evidence that the account is a sham.
- Related Hostile Interactions: Has this person been leaving nasty comments on your posts or sending you aggressive messages? Document those, too. It helps establish a pattern of malicious behavior.
This collection of screenshots is the bedrock of your report and any appeals that might follow. Keep them organized in a dedicated folder with clear file names so you can find them easily.
Investigating the Reviewer's Profile
A suspicious profile is often the smoking gun. When you dig into the user's page, you’re looking for red flags that scream "this account isn't real" or "this account was made just to attack my business."
Keep an eye out for these telltale signs:
- A Generic Profile Picture: Is their photo a stock image, a cartoon character, or a celebrity? Real people usually have photos of themselves, family, or friends.
- No Friends or a Low Friend Count: An account with only a handful of friends (or a private friends list) is a major red flag. It suggests it’s not a genuine, active profile.
- Recent Creation Date: If the profile was created just days—or even hours—before they left the negative review, it’s a pretty strong indicator of a malicious motive.
- No Other Activity: A legitimate profile typically has a history of posts, photos, and interactions. A barren timeline is highly suspect.
- A History of Negative Reviews: Check their other public activity. Sometimes, these accounts leave a trail of similar negative feedback on other business Pages, revealing a pattern of spam or harassment.
By documenting these profile inconsistencies, you're no longer just claiming a review is fake; you're providing circumstantial evidence that supports your conclusion. This is crucial for convincing a human moderator.
This methodical approach is absolutely vital. You have to remember the sheer volume of content Facebook deals with. For context, their own reports show they removed 22.1 million pieces of hate speech in a single quarter, with AI catching 95% of it before anyone even reported it. Much of this hate speech and harassment, which saw 3.5 million removals in the same period, can easily be disguised as a defamatory "review." Your detailed evidence is what helps moderators connect the dots. You can read more about Facebook's content enforcement efforts to grasp the scale of the challenge.
Creating an Evidence Timeline
If the negative feedback is part of a longer-term harassment campaign—maybe from a disgruntled ex-employee or a bitter competitor—a timeline is your best friend. This log helps you present a clear, coherent story to Facebook's support team.
Set up a simple document or spreadsheet to track every interaction. For each entry, note the:
- Date and Time: Exactly when the incident happened.
- Action Taken: What occurred (e.g., "Negative 'No' recommendation posted," "Harassing comment left on post X").
- Evidence Link: A reference to the corresponding screenshot (e.g., "Screenshot_01.jpg").
- Notes: A quick description of the content and why it violates policy.
A timeline transforms a bunch of isolated incidents into a clear pattern of targeted abuse. When you need to escalate your case or file an appeal, sending a well-organized timeline is infinitely more effective than a folder of random screenshots. It shows you're serious, organized, and have a legitimate complaint that deserves a closer look.
What to Do When Your Initial Report Is Denied
So, you got that dreaded "We did not remove this content" notification from Facebook. It feels like hitting a brick wall, especially when you’re staring at a recommendation you know is completely fake. It's incredibly frustrating, and honestly, this is where most business owners give up.
But here’s a secret about how Meta's moderation works: that first denial is almost always just the start of the process, not the final word.
Think of it this way: your first report was likely scanned by an algorithm. That AI lacks the context to understand the nuance of a disgruntled ex-employee posing as a customer or a competitor launching a smear campaign. Your real goal now is to get your case in front of an actual person, and the appeal process is your ticket in.
Finding the Appeal Option
Once your report is denied, Facebook should give you an option to "Request a Review" or "Disagree with Decision." You'll find this tucked away in your Support Inbox.
To get there, navigate to your Page's settings and look for the Support Inbox. Inside, you'll see the original report you filed. Click on it, and the option to appeal should be right there. Don't just close the window in frustration—this is your single best chance to get a second look from human eyes.
Crafting a More Persuasive Argument
Your appeal is not a time to just re-submit the same complaint. You need to build a stronger case. The AI didn't get it, so now you have to make your argument airtight for a human moderator. This means shifting your approach from simply stating the problem to proving the violation.
Here’s how to do it better the second time around:
- Quote the Rulebook: Don't just say, "This is fake." Name the specific policy it violates. For example: "This recommendation violates Facebook’s Community Standard on Fraud and Deception. We have searched our records and have no evidence of this individual ever being a customer."
- Show, Don't Just Tell: Attach the evidence you collected earlier—the screenshots, the timeline. Then, in the text field, explain exactly what it proves. For instance: "Please see the attached screenshots. The reviewer's profile was created yesterday, has zero friends, and has only posted this one recommendation, strongly indicating it is a fake account."
- Explain the Real-World Harm: Briefly and professionally, describe the damage this is causing. "This false claim about food poisoning is directly harming our reputation and has led to a noticeable drop in reservations this week."
This structured approach does the heavy lifting for the moderator. You're showing them you're serious, you've done your homework, and you have a legitimate case, which greatly increases your odds of getting those fake facebook remove reviews requests approved.
Remember, the appeals process exists for a reason. Moderation systems, even sophisticated ones, make mistakes. Persistence and clear, undeniable proof are your best tools here.
The sheer scale of content moderation means errors are inevitable. That's why appeals are so critical. Just look at the data: between March 2020 and July 2022, Meta took down 27 million pieces of COVID-19 misinformation, but it later restored 1.3 million of those after users appealed.
You can dig into the numbers yourself in Meta's content moderation and appeals data. This shows that the system is built to reverse decisions when new evidence or context comes to light—a dynamic that works in your favor when fighting to remove a bogus review.
An appeal isn't a long shot; it’s a necessary step in correcting the system's errors. By calmly presenting a stronger, evidence-backed case, you give yourself the best possible chance of getting that malicious recommendation taken down for good.
Play Offense: Proactive Strategies for a Stronger Online Reputation
Reacting to bad reviews is part of the game, but the best defense is a good offense. When you actively build a strong, positive reputation, you create a buffer that makes any single negative comment seem like a small blip on the radar. It's about shifting from constant damage control to building an online presence that's authentic and resilient.
Your most powerful asset here is a steady stream of genuine, positive recommendations. This does more than just boost your star rating; it builds powerful social proof that can easily drown out the noise from one unhappy customer. Think of it like building a strong brick wall—one loose brick won't make it crumble.
How to Encourage Authentic Positive Recommendations
The secret to getting more good feedback is simply making it dead simple for your happy customers to leave it. Most people who have a great experience just move on with their day. You have to give them a gentle nudge.
- Timing is everything. The absolute best time to ask for a recommendation is right after a win. Maybe you just wrapped up a successful project, a customer raved about your support team, or they tagged you in a happy post on their own feed. That's your moment.
- Keep it simple and direct. Ditch the corporate jargon. A quick, personal message like, "So glad we could help you out! If you have a minute, sharing your thoughts on our Facebook Page makes a huge difference for us," works wonders.
- Use your existing real estate. Add a low-key link to your Facebook Page in your email signature or at the bottom of your invoices. Something as simple as, "Love our work? Leave a recommendation!" can bring in a slow but steady flow of positive feedback without you having to lift a finger.
By weaving these small asks into your everyday workflow, you'll build up a library of positive sentiment that speaks volumes for you.
The Art of the Public Reply
How you respond to feedback—both the good and the bad—often says more about your business than the original comment itself. A calm, professional, and genuinely helpful public reply can transform a negative review into a masterclass in customer service. On the flip side, radio silence just makes you look like you don't care.
Remember This: Your public reply isn't just for the person who wrote the review. It’s for every single potential customer who will read it down the line. You're showing them you're engaged, professional, and dedicated to getting it right.
For glowing reviews, a simple, "Thank you so much for the kind words!" is perfect. It shows you're listening and you appreciate them.
For negative ones, the goal is always to acknowledge, empathize, and move the conversation offline. A go-to template is: "We're so sorry to hear about your experience, as this isn't the standard we strive for. Could you please email us at [support email] so we can look into this for you?" This approach is effective and shows you take concerns seriously. For a deeper dive into these tactics, our guide on managing your online reputation offers more detailed strategies.
When Is It Time to Turn Off Recommendations Entirely?
Hitting the "off" switch on Facebook recommendations is a pretty drastic move, but in a few specific scenarios, it's a necessary last resort. If your page is being targeted by a coordinated attack—think a sudden flood of fake one-star reviews from bots or an organized harassment campaign—turning them off can stop the bleeding immediately.
Taking this step hides all your existing recommendations (good and bad) and prevents any new ones from being posted. The major drawback, of course, is that you lose all that hard-earned positive social proof. It's a tough trade-off, one you should only make when the damage from a malicious attack becomes truly overwhelming.
Interestingly, back in 2020, Facebook actually decreased its overall content removals by 21% while other platforms were ramping up. This trend can make it harder to get fake negative reviews removed if they're framed as "opinions." That reality makes proactive management all the more important. To get more control over your page, you can also explore tools like Facebook Moderation Assist, which can help you automatically filter certain types of unwanted content.
Your Top Questions About Facebook Reviews, Answered
When you're dealing with a bad Facebook recommendation, it's easy to feel stuck. You're not alone—most business owners run into the same confusing situations and need answers, fast. Let's cut through the noise and tackle the most common questions head-on.
How Long Does Facebook Actually Take to Remove a Review?
This is the million-dollar question, and unfortunately, the answer is "it depends." The timeline for getting a review taken down can be all over the place, depending on how obvious the violation is and how swamped Meta's support teams are.
If you're dealing with something blatant—like pure spam with a sketchy link—Facebook's automated systems might zap it within 24 to 48 hours. Those are the easy ones.
But for anything more complex, like harassment or a fake review that looks real, a human needs to step in. Once it goes to manual review, you could be waiting several days, sometimes even a full week. If you end up appealing a decision, the clock starts all over again. My advice? Be patient, but if a week passes with radio silence, it's time to check your Page’s Support Inbox for an update.
Can I Just Turn Off Recommendations Altogether?
Yes, you can. It's the nuclear option, but it's available.
To pull the plug, head to your Page Settings, find 'Templates and Tabs', and just toggle the 'Reviews' or 'Recommendations' tab to the "off" position. Simple as that.
A Word of Caution: This is an all-or-nothing move. Flipping that switch hides all of your recommendations—the glowing ones you worked so hard for, the neutral ones, and the bad ones. It also stops anyone new from leaving feedback. While it’s a great way to halt an online mob, you lose all that valuable social proof. Think of it as a last resort, not your first line of defense.
What if the Bad Review Was True, but We've Since Fixed It?
Facebook won't remove a review just because you made things right with the customer. From their perspective, the review is a snapshot of a real experience that happened at a specific time, so it stays.
Don't focus on removal here. Instead, turn it into a win with a polished public response.
- Own It and Apologize: Reply directly to the review. Acknowledge their complaint and sincerely apologize that their experience wasn't up to par.
- Move the Conversation Offline: Mention that you've already connected with them privately to resolve the situation. This shows potential customers that you're proactive and take feedback seriously.
- Gently Ask for an Update: Once you've genuinely fixed the problem, it’s perfectly fine to ask, politely, if they'd consider updating their recommendation. Never be pushy. A simple, friendly "We're so glad we could resolve this for you. If you have a moment, we'd appreciate it if you'd consider updating your review" is all it takes.
Does Blocking a Person Make Their Review Disappear?
No, and this is a common misconception that causes a lot of headaches. Blocking someone who left a negative review will not remove what they've already written.
Here’s what blocking actually does. It prevents them from interacting with your Page in the future. They won't be able to:
- Post to your Page
- Comment on your content
- Send your Page a message
- Like your Page
The review they already left, however, will remain right where it is. Blocking is a tool for stopping future harassment, not for wiping the slate clean. To get the review removed, you still have to go through the official reporting process and prove it violates Facebook's Community Standards.